Here's my Flicker Forge Album
I'm adding captions to the photo's still. Hopefully these help folks who might be having a hard time envisioning getting from the shopping trip to Home Depot to a finished burner.
Wednesday, September 28, 2011
Monday, September 26, 2011
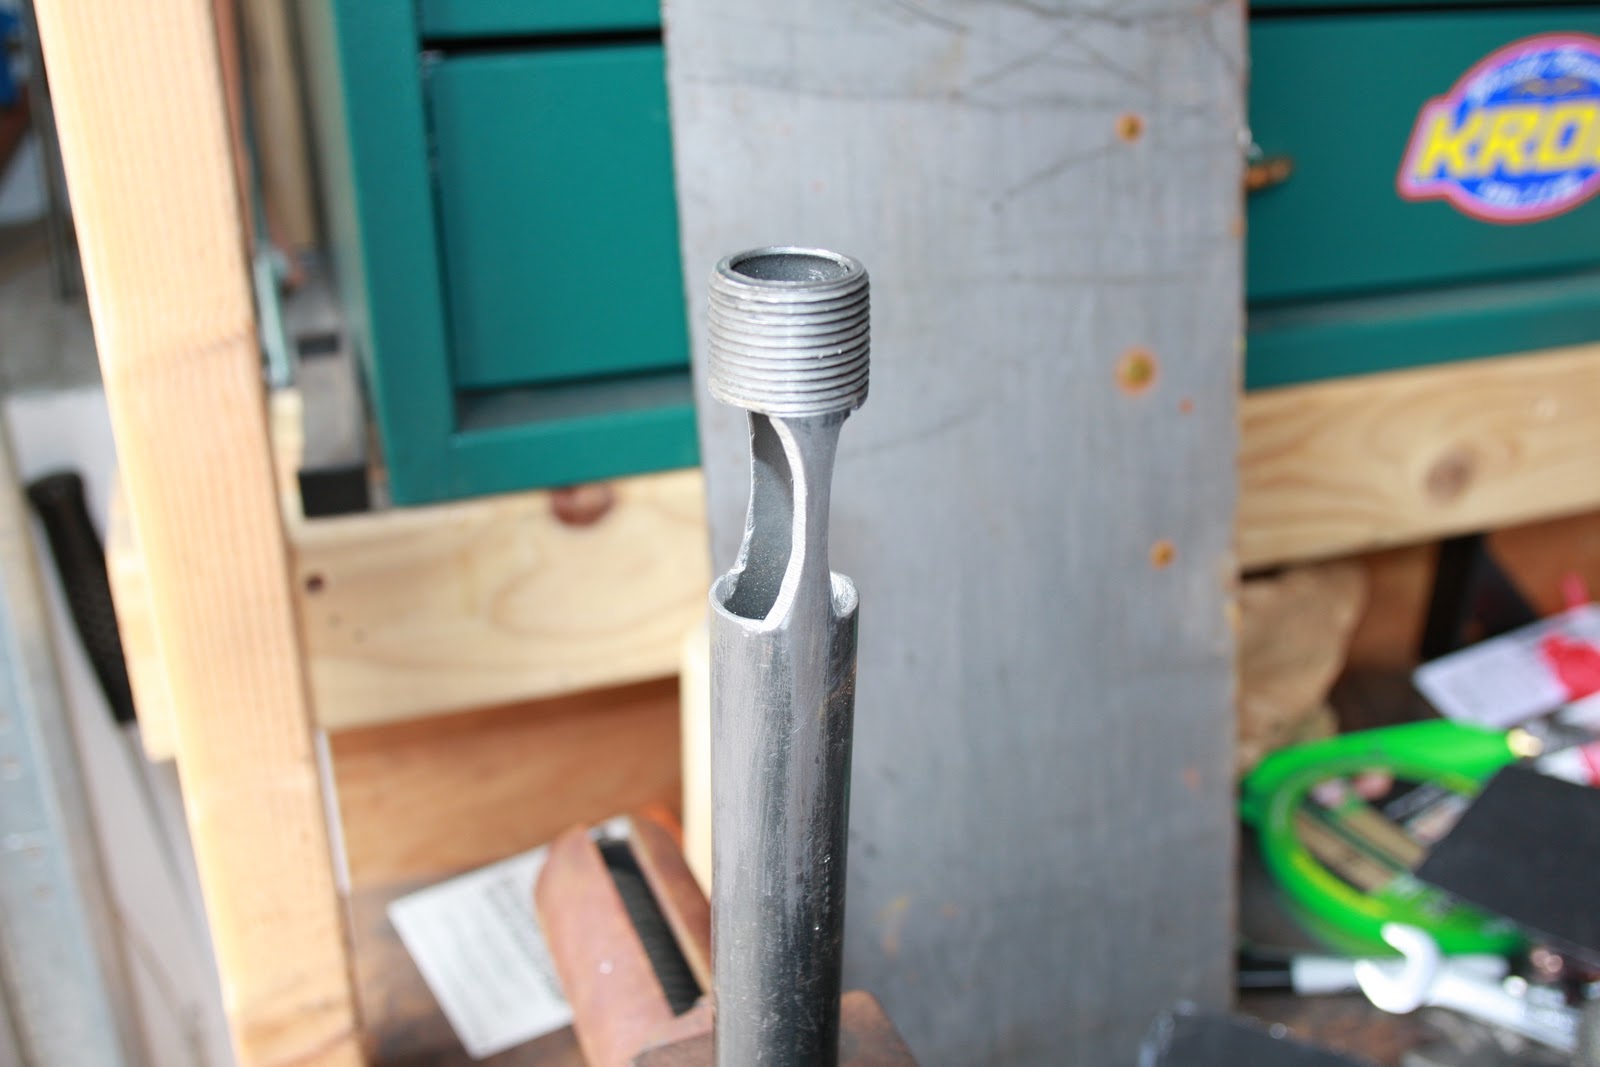
The magic is 27/64ths
So the magic on the adapter between the 1/8" pipe and the 3/4" pipe is the 27/64ths drill and the 3/4 inch pipe thread to 3/8 inch compression reducer.
- Remove the compression ring from the fitting
- Using cardboard or a couple small pieces of wood to pad the compression ring, clamp it into either a vice or some vice grip plyers or find some other way to hold it
- Cut a slot in the ring perpendicular to it's circumference using a hack saw or a coping saw, the slot can actually be wider than this
- Drill out the fitting with the 27/64ths bit
- Slip the split ring over the 1/8" pipe
- Apply some kind of grease to the compression ring in case it needs to be removed
- Slide the compression nut over one end of the pipe and the drilled out fitting over the other one
- Tighten it up
Now you can loosen it, adjust the position of the jet, and tighten is back up.
Once it's up to about 10 foot pounds it centers nicely. When it's just snug, you can wiggle it around a good bit as if it was a ball joint with limited range. An improvement would be to use a counter sink to restore more of the taper removed by drilling.
Cost wise, this might be a bit more expensive. The fitting is like $15.00. An iron 3/4" plug, a couple of taps, and a couple of screws is probably $5.00 less.
Sunday, September 25, 2011
Now there are two
More FIRE!
This morning it started raining so that pretty much put the damper on doing any work on the furnace box. After doing some work for a couple hours, I decided to go ahead and get burner number two going. As you can see here, it was a success.
There are a couple of differences worth noting. One, I used a coupler for liquid tight electrical conduit. Two, I used a 3/4 inch MIP to 3/8 inch compression reducer to hold the gas jet pipe. This was to improve on the DIY compression clamp I made out of the bored out hose barb.
The compression ring was cut with a hacksaw thus removing enough material to let it compress more and allowing it to be expanded of the threads of 1/8 inch brass pipe used for the jet tub. The fitting normally has a stop where a tube or pipe would be inserted to. This had to be removed and the inside diameter had to be increased for the pipe. I did this on my mini lathe. But I think it can be done with a 27/64ths drill. Anyway, This seem to be a good improvement over drilling out the cast iron plug and putting set screws in that.
The other difference is the shape of the air passages. I tried rounding the new ones. The size of the base rectangle is the same. I used a grinder to rough out the round shape. Then I filed it to round it out.
Interestingly enough, the jets ended up at about the same spot.It should be interesting to see if they behave the same when they are put in the forge.
 |
| Burner #2 running at 30 psi of propane |
 |
| Burners #1 & #2 |
The compression ring was cut with a hacksaw thus removing enough material to let it compress more and allowing it to be expanded of the threads of 1/8 inch brass pipe used for the jet tub. The fitting normally has a stop where a tube or pipe would be inserted to. This had to be removed and the inside diameter had to be increased for the pipe. I did this on my mini lathe. But I think it can be done with a 27/64ths drill. Anyway, This seem to be a good improvement over drilling out the cast iron plug and putting set screws in that.
The other difference is the shape of the air passages. I tried rounding the new ones. The size of the base rectangle is the same. I used a grinder to rough out the round shape. Then I filed it to round it out.
Interestingly enough, the jets ended up at about the same spot.It should be interesting to see if they behave the same when they are put in the forge.
Saturday, September 24, 2011
Little Boxes ...
So after the successful burner test I went back to the furnace part of the build. At this point it's pretty much a process of adding bricks, and cutting & welding steel. This is very much a design as I go process. It looks a lot different as it comes together than I could ever imagine it on paper.
 I stopped today with the first two bricks of the lid in place. I'm not sure I'm happy with this. I think in the morning I'm going to make a 30 degree jig to hold the bricks on the tile saw better. Right now I'm just propping them up with another brick and eyeballing the alignment of the blade to a pencil line. Time consuming.
If the jig works, I'll feel better. That will allow me to cut some slivers to put in the gap between the lid bricks and the top course of the sides.
I could get really tricky and do some nifty half laps & stuff, but c'mon. The Sair-Set grout will probably do just fine.
More tomorrow.

If the jig works, I'll feel better. That will allow me to cut some slivers to put in the gap between the lid bricks and the top course of the sides.
I could get really tricky and do some nifty half laps & stuff, but c'mon. The Sair-Set grout will probably do just fine.
More tomorrow.
We have fire, and a lot of it!
 |
| Burner running at 20 psi |
With the .30 tip I'm able to have a stable flame up to 30 psi of propane. I'm happy with it. I'm not going to try the .35 right now.
At first I did not want to go higher with it clamped in the vice shooting out the front of the garage. Once it got a little darker and I could see the flame, I got a little more aggressive with the pressure. The adjusting clamp for the jet position is working nicely. I can get it snug, tune the flame with it running and then clamp it down after that.
There IS a sweet spot. I was able to go from rich to good to rich again. The sound of the flame is the give away. A big crackly flame is too rich. The quiet smooth flame is just about right.
Quiet is a relative term with this propane burner. It's not like a propane torch or a gas furnace or a propane BBQ. It has that unmistakeable gas torch sound. You can talk around it, but it's not silent at all.
DANGER - Gotta be careful! If I pull the jet too far back it flares at the air ports. At 5 psi it was a damn big flame! Fortunately it did not flare at 20 or higher.
 | |
| Air slots after being opened up, rounded a bit, having the edges filed off & sanded |
Staying on track - I've been looking at the recuperative forge designs like the Sandia Labs forge. Ya know what? I'm gonna wait until I get this one working before I start taking it up a notch. My experience tells me there is a lot to learn here. I should get to a stable base line at as little cost possible, and then go from there.
I feel better proceeding with the furnace build now that I know I can make enough fire. I've got a lot of pictures. Hopefully I will be able to document this build in a very detailed way later. Right now I need to get this thing going.
Monday, September 19, 2011
When you're a jet ...
 Here is what I think the gas jet is going to end up like.I've been trying to figure out a better way to do this since I drilled out the cast iron plugs. Getting a drill the same size as the pipe is almost impossible. If it were, the threads are rolled on a lot of these smaller pipes so the thread diameter ends up actually a little bigger than the pipe. Small problem when you are trying to get a tight fit around the body of the pipe.
  So I started thinking about the flare mentioned on one of the other burner sites. He slit a pipe nipple and screwed it into a coupling giving the inside of the the nipple a taper. So I thought that would be a good way to clamp the gas jet tube if I could find a combination of parts and slit whatever was screwing into a plug or reducer. So ... I dug out a 1/4 inch hose barb, drilled it out to 25/64ths, slit the remaining hollowed out "plug" in two directions and screwed it into a bushing. Put the gas jet pipe in there and cranked down the plug. Sure enough, it clamped down on the gas jet pipe. Solution!
 Well more on this later.
Friday, September 16, 2011
Burner Design
Well, I've Googled and Binged "propane burner", "propane forge burner", "Ron Reil", and all imaginable combinations of that and other things burner like. There are lot's of good ideas and burners out there. Then I ran into the "Oliver-Upwind" burner and build at http://www.backyardmetalcasting.com/oliverburner1.html Stupid simple. Seem to work great.
Check out this link for the Boorman build.
Conclusion - you can pretty much squirt gas into a tube with some kind of a flare at the end, light it and it'll go. There's some tweaking needed with where you might put holes on the tube and / or some kind of a bell near the gas jet to be sure. However it's pretty basic. I'm sure getting from this, to some super efficient burner requires a PhD and a $2 million research grant. But we are talking about introducing gas and air into a box that will be approaching 2000 degrees. Getting it to burn all the way is not a question. Getting it get past 1000 degrees, that's a different question.
One cool discovery is that MIG welding tips make great propane jets.
To test my theory I took apart a propane torch, used just the jet to squirt gas into a 3/8 inch pipe with a bell reducer on the end for a flame holder. Worked! Not great, but it worked. Heck I was holding everything by hand. So I'm going to use the basic Reil, Vulle, Cook burner with the Krucible reducer as a flame holder. I do like Larry Zoeller's design too. He uses a bored out pipe plug as a jet stalk holder. This allows the jet to be positioned in the pipe at various positions and tuned to the best spot for the given combinations of parts.
Sunday, September 11, 2011
Forge Build Day One
 |
| Base & First Course |
It immediately became apparent that I needed to cut the brick so that I could stagger as many seams as possible. I split a few cross wise and a couple length wise. I used my tile saw. A dry cut skill saw blade could be used or you could use a brick set.
A brick set is a wide flat cold chisel. Once good shot with the hammer and most bricks snap pretty cleanly. If you are using a brick set I recommend that you use it on a flat hard surface. The idea is to keep the force of the cut as linear as possible. If the brick is stressed in other directions the crack will travel in the direction of the highest stress vectors.
 |
| Tile Saw Used To Cut Bricks |
 |
| Angle Notched At Corners |
 |
| Base Frame After Welding |
 |
| Base Course In Frame |
That's it for the day one. This all took about five hours from getting out the tools to getting cleaned up. Next will be adding some vertical corners and sizing up the lid.
Friday, September 2, 2011
Anvil

Sometimes I wonder about fate and divine intervention. I decided I wanted to get back into blacksmithing. Right after this, several things "came" to me.
First we were on a short trip to Sacramento. We took the morning to go to the train museum in Old Town. There we went into one of the shops. They had a nice book on the blacksmithing craft. One of the best I have ever seen. I bought it.
Next I did a Yelp search for fire brick and found some good enough for a forge a few miles from home.
Finally I did a search on E-Bay for an anvil. One was there for $350.00 in Chico. Chico is close enough to drive. When you are trying to get hold of something that weighs 152 lbs., the shipping is really an issue. So for the cost of a tank of gas and $350.00 I got an anvil.
It's a nice anvil. Good ring. Classic shape.
It belonged to the sellers Dad. They both used it a little for this and that. It sounds like it's been in Northern California since this guy was a kid. So at least 40 years.
This weekend I will try to get the forge built and working. Maybe I'll be able to pound on some red hot steel!
Subscribe to:
Comments (Atom)